Enabling remote SSH access on your Raspberry Pi is essential if you want to control your device from anywhere without needing a monitor or keyboard attached to it. SSH (Secure Shell) allows you to securely connect to your Raspberry Pi from another computer, whether you're at home or across the globe. This guide will walk you through every step of the process, ensuring you can set up remote access with confidence.
SSH is not just a convenient tool; it's also highly secure, making it ideal for managing servers, automating tasks, and controlling IoT devices. In this article, we will cover everything from the basics of SSH to advanced configurations, ensuring you have all the information you need to get started.
Whether you're a beginner or an experienced user, this guide will help you master the art of enabling remote SSH access on your Raspberry Pi. Let's dive in!
Read also:Find Your Rising Sign And Moon Sign Unlock The Secrets Of Your Zodiac Profile
Table of Contents
- Introduction to SSH
- Why Enable Remote SSH Access?
- Requirements for Enabling Remote SSH
- How to Enable SSH on Raspberry Pi
- Finding Your Raspberry Pi's IP Address
- Connecting to Your Raspberry Pi via SSH
- Securing Your SSH Connection
- Troubleshooting Common Issues
- Advanced SSH Configurations
- Conclusion
Introduction to SSH
SSH, or Secure Shell, is a cryptographic network protocol that allows users to securely connect to remote devices over an unsecured network. It is widely used in server management, network administration, and IoT device control. By enabling SSH on your Raspberry Pi, you can manage your device remotely, execute commands, and transfer files without needing physical access.
SSH provides encryption for all data transmitted between devices, ensuring that sensitive information remains secure. This makes it an ideal choice for controlling your Raspberry Pi from another computer, whether you're at home or traveling.
Understanding SSH is crucial for anyone looking to enhance their Raspberry Pi's functionality. In the next section, we'll explore why enabling remote SSH access is beneficial.
Why Enable Remote SSH Access?
Enabling remote SSH access on your Raspberry Pi offers numerous advantages:
- Remote Management: Control your Raspberry Pi from any location with an internet connection.
- Headless Operation: Operate your Raspberry Pi without a monitor, keyboard, or mouse.
- File Transfer: Securely transfer files between your Raspberry Pi and other devices using SCP (Secure Copy Protocol).
- Automation: Automate tasks and scripts on your Raspberry Pi from a remote location.
These benefits make SSH an indispensable tool for both hobbyists and professionals. In the following section, we'll outline the requirements for enabling SSH on your Raspberry Pi.
Requirements for Enabling Remote SSH
Before you begin, ensure you have the following:
Read also:Bernie Anders Wife Net Worth A Comprehensive Guide
- A Raspberry Pi with Raspbian (or any compatible OS) installed.
- An active internet connection for your Raspberry Pi.
- A computer or laptop to connect to your Raspberry Pi via SSH.
- An SSH client (such as PuTTY for Windows or Terminal for macOS/Linux).
Once you have all the necessary components, you can proceed to enable SSH on your Raspberry Pi. Let's explore the different methods available.
How to Enable SSH on Raspberry Pi
There are several ways to enable SSH on your Raspberry Pi. Below, we'll cover three popular methods:
Method 1: Using the Graphical Interface
If you're using the Raspberry Pi Desktop interface, enabling SSH is straightforward:
- Open the Raspberry Pi Configuration tool from the Preferences menu.
- Go to the "Interfaces" tab.
- Select "Enabled" next to SSH and click "OK."
This method is ideal for beginners who prefer a visual approach to configuring their Raspberry Pi.
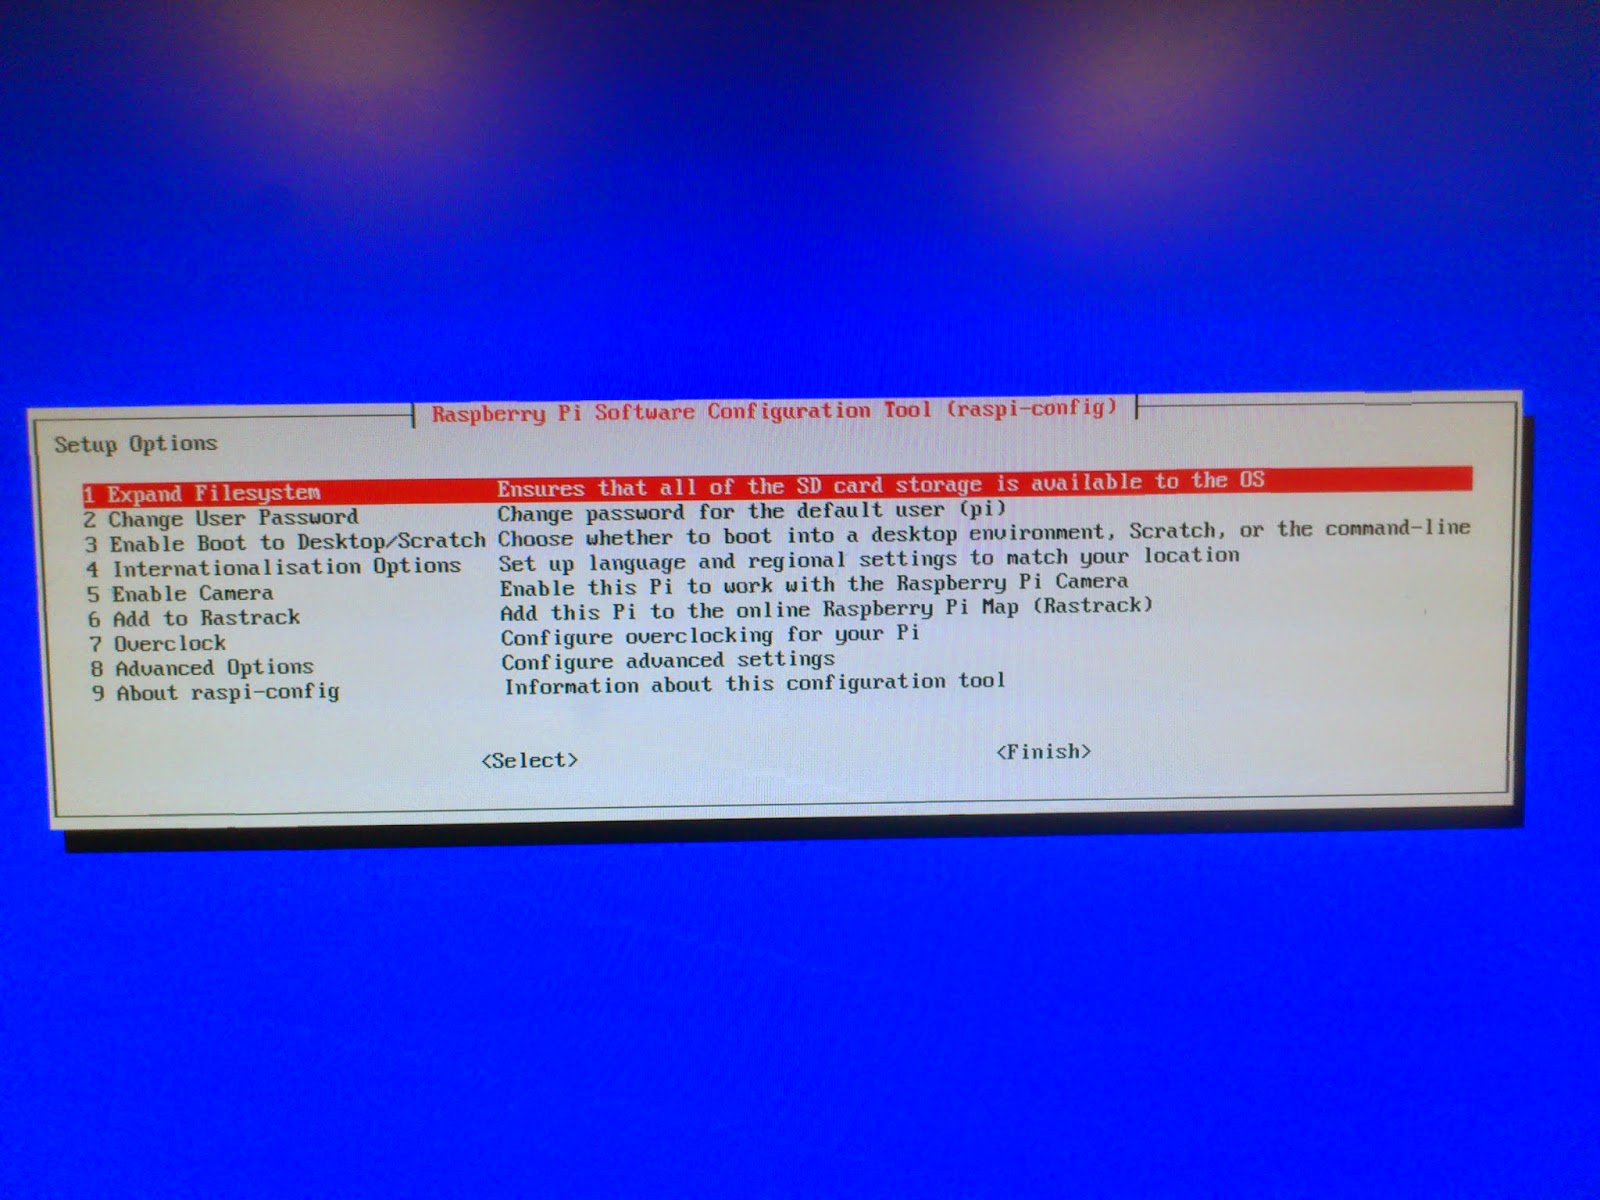
Method 2: Using the Command Line
For users who prefer the terminal, enabling SSH via the command line is quick and efficient:
- Open the terminal on your Raspberry Pi.
- Type the following command and press Enter:
sudo raspi-config
- Navigate to "Interfacing Options" and select "SSH."
- Choose "Yes" to enable SSH and then exit the configuration tool.
This method is particularly useful for headless setups where the graphical interface is unavailable.
Method 3: Creating an SSH File
If you're setting up a new Raspberry Pi for the first time, you can enable SSH by creating a file named "ssh" on the boot partition:
- Insert your Raspberry Pi's SD card into your computer.
- Navigate to the boot partition and create an empty file named "ssh" (no file extension).
- Insert the SD card back into your Raspberry Pi and power it on.
This method is perfect for users who want to enable SSH without needing to boot into the Raspberry Pi first.
Finding Your Raspberry Pi's IP Address
To connect to your Raspberry Pi via SSH, you'll need to know its IP address. Here's how you can find it:
- Using the Command Line: Type "ifconfig" in the terminal and look for the "inet" address under the "wlan0" or "eth0" section.
- Using the GUI: Click on the network icon in the top-right corner of the screen and select "Connections."
Alternatively, you can use tools like Advanced IP Scanner or Fing to discover your Raspberry Pi's IP address on the network.
Connecting to Your Raspberry Pi via SSH
Once SSH is enabled and you have your Raspberry Pi's IP address, you can connect to it from another computer:
- Open your SSH client (e.g., Terminal on macOS/Linux or PuTTY on Windows).
- Enter the command "ssh pi@
" and press Enter. - When prompted, enter the default password ("raspberry") or your custom password if you've changed it.
You should now have a secure connection to your Raspberry Pi. From here, you can execute commands, transfer files, and manage your device remotely.
Securing Your SSH Connection
While SSH is inherently secure, there are additional steps you can take to enhance its security:
- Change the Default Password: Update the default "raspberry" password to a strong, unique one.
- Disable Root Login: Edit the SSH configuration file ("/etc/ssh/sshd_config") and set "PermitRootLogin" to "no."
- Use Key-Based Authentication: Generate SSH keys on your computer and add the public key to your Raspberry Pi's authorized_keys file.
By implementing these security measures, you can protect your Raspberry Pi from unauthorized access.
Troubleshooting Common Issues
Here are some common issues you might encounter when enabling SSH on your Raspberry Pi and how to resolve them:
- SSH Not Working: Ensure that SSH is enabled and your Raspberry Pi's IP address is correct.
- Connection Refused: Check your firewall settings and ensure that port 22 is open.
- Authentication Failed: Verify that you're using the correct username and password.
If you continue to experience problems, consult the Raspberry Pi documentation or seek help from online forums.
Advanced SSH Configurations
For advanced users, there are several configurations you can make to enhance your SSH experience:
- Port Forwarding: Set up port forwarding on your router to access your Raspberry Pi from outside your local network.
- Dynamic DNS: Use a dynamic DNS service to access your Raspberry Pi using a domain name instead of an IP address.
- Tunneling: Create SSH tunnels to securely access services running on your Raspberry Pi.
These advanced configurations can help you unlock the full potential of SSH on your Raspberry Pi.
Conclusion
Enabling remote SSH access on your Raspberry Pi is a powerful way to enhance its functionality. Whether you're managing a home server, automating tasks, or controlling IoT devices, SSH provides the tools you need to do so securely and efficiently.
By following the steps outlined in this guide, you can enable SSH on your Raspberry Pi using the method that best suits your needs. Remember to secure your connection and explore advanced configurations to get the most out of your device.
We encourage you to share your experiences with SSH in the comments below or explore other articles on our site for more Raspberry Pi tips and tricks. Happy tinkering!